
-
Create a client token.
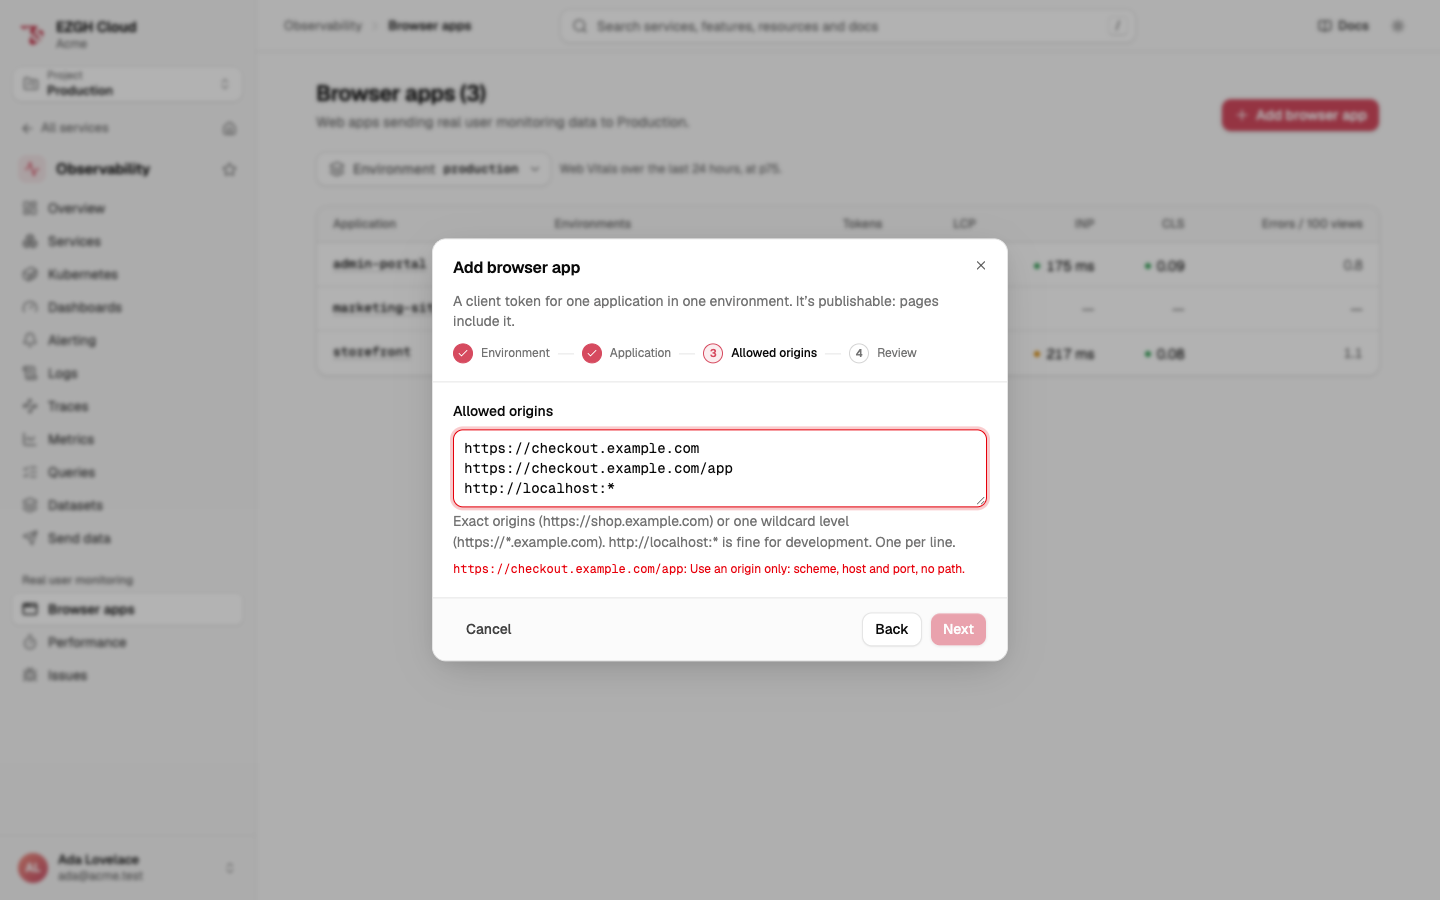
In the console, open Observability > Real user monitoring > Browser apps and click Add browser app. Choose the environment, name the application, and list the origins your pages are served from (one per line). The app’s Setup tab then shows the code below with your token filled in.
Or with the CLI:
ezgh obs browser-apps tokens create --application storefront --environment production \
  --origin https://shop.example.com --origin 'http://localhost:*'
The token,
ezgh_ct_…, is printed with the rest of the token’s settings. See Client tokens.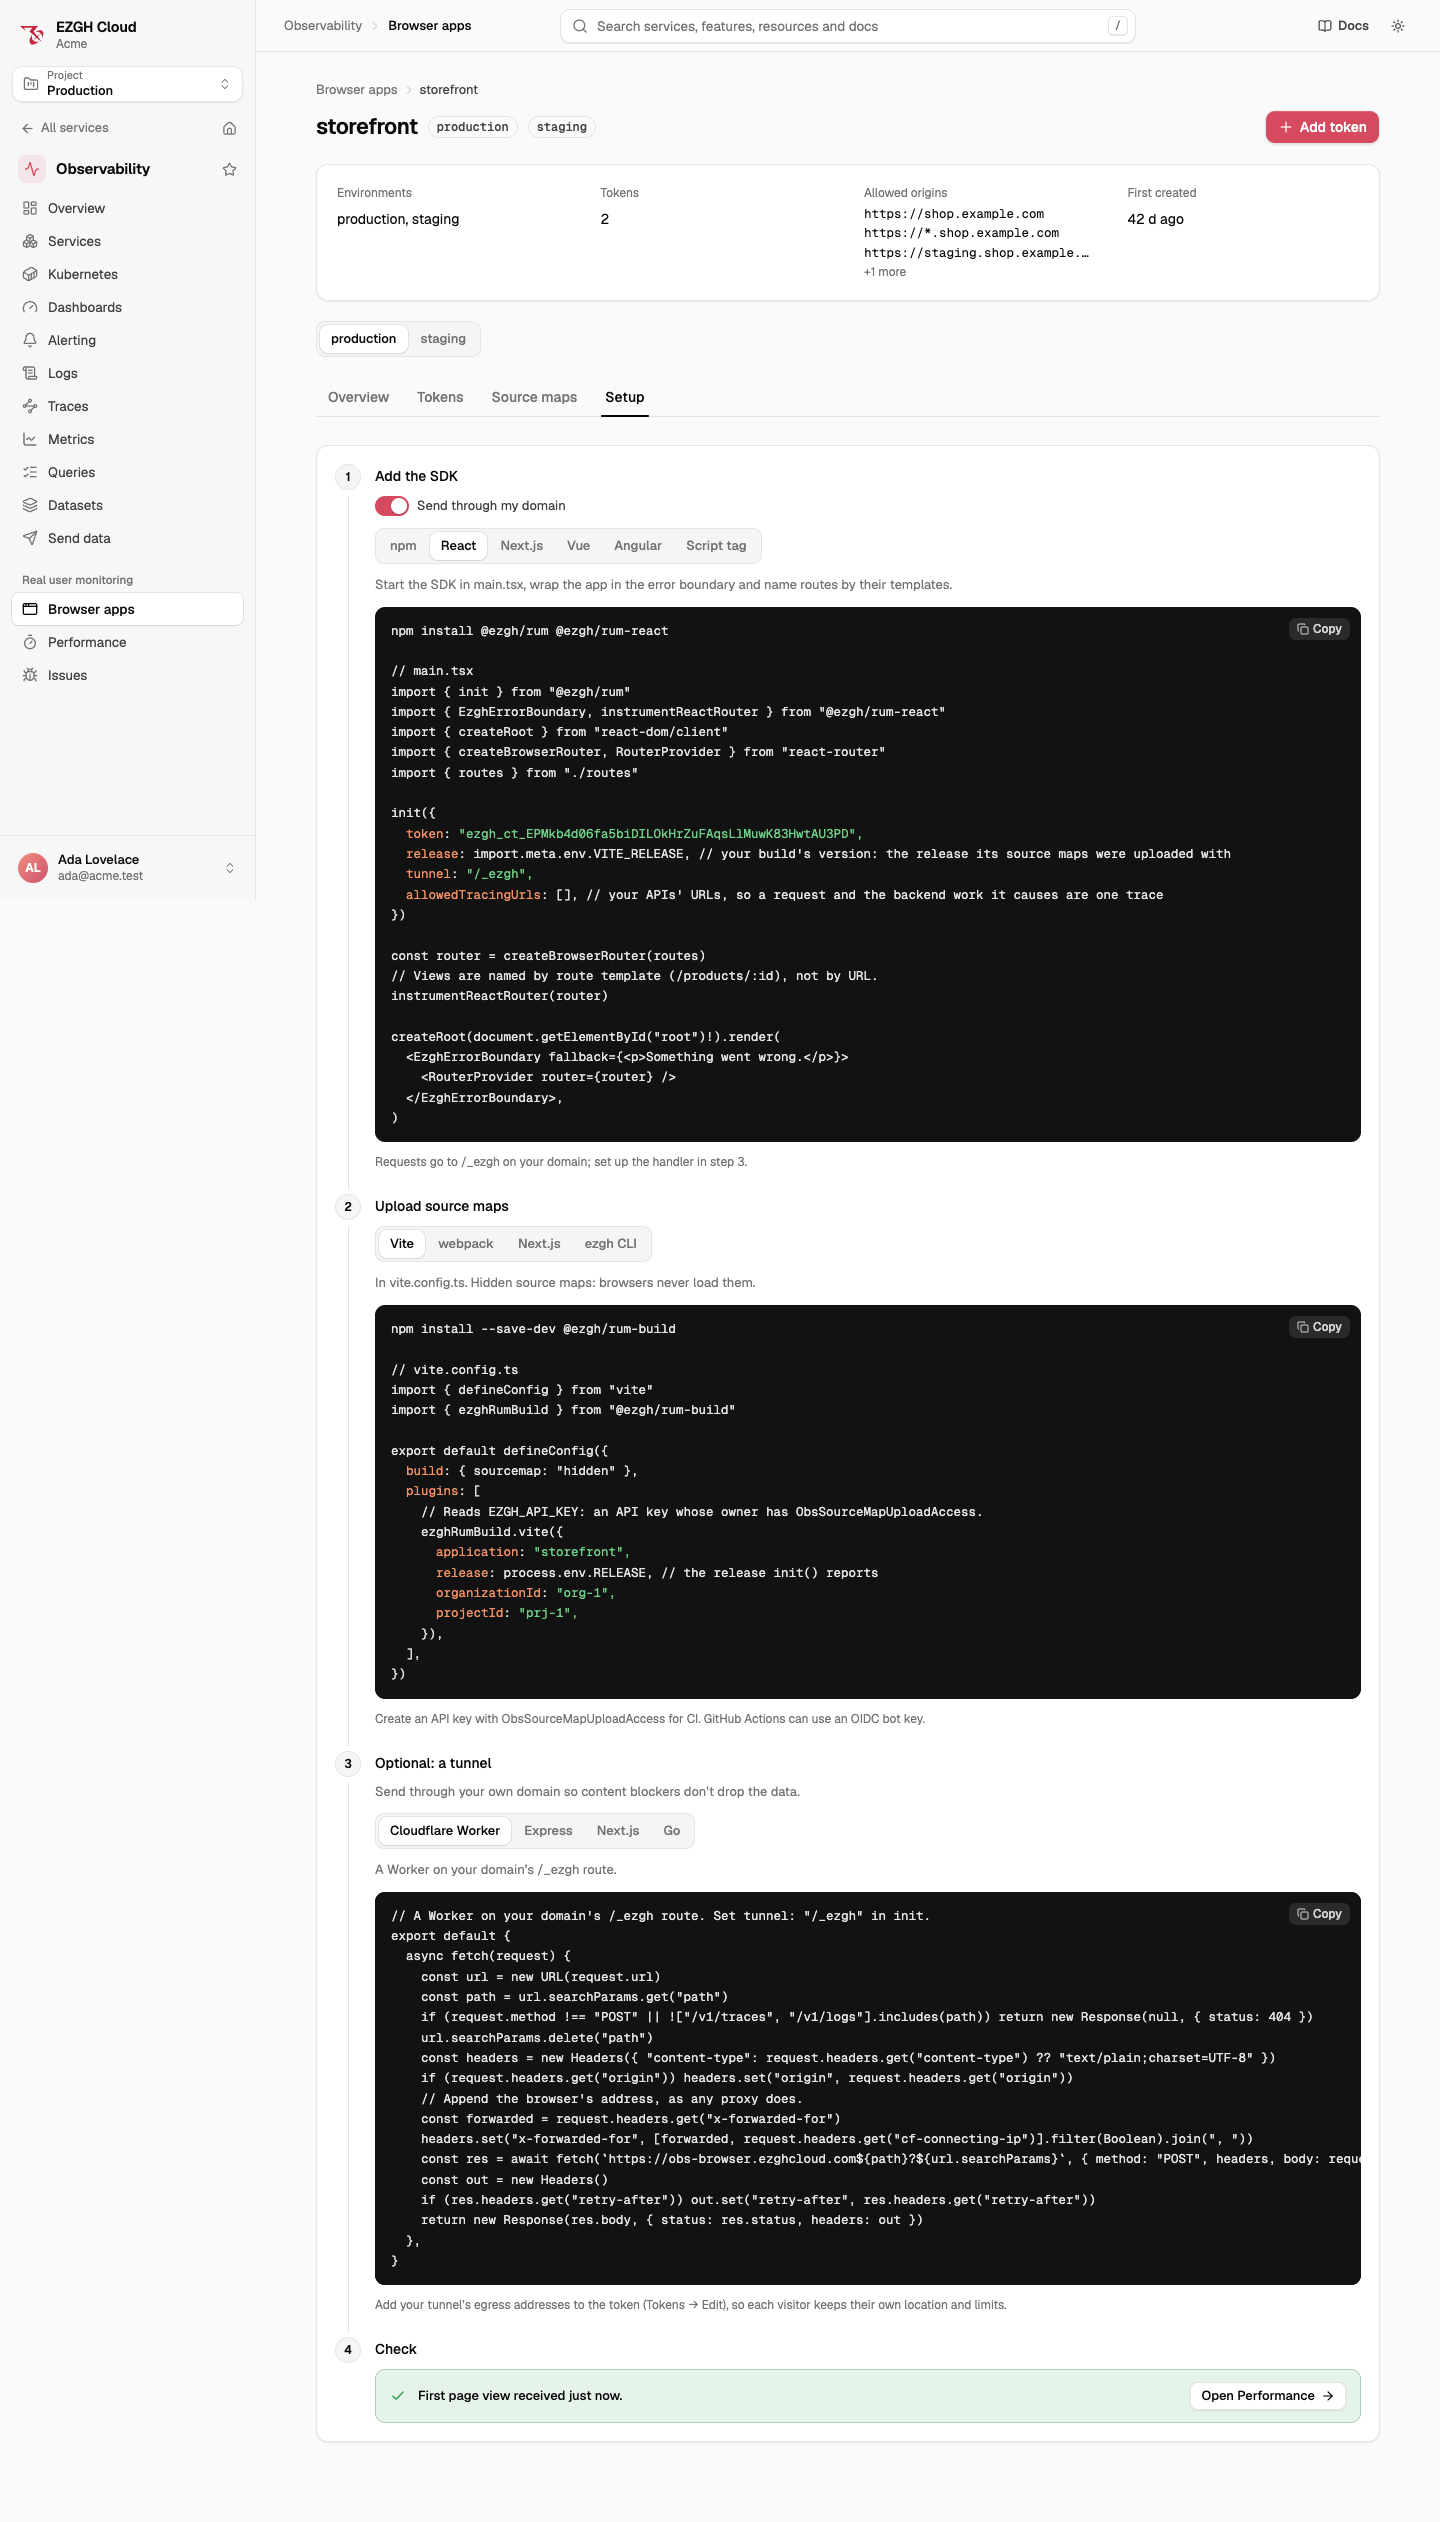
-
Install the SDK. Call
initas early as you can, once, with the token and your build’s version asrelease. The release is what matches errors to your source maps, and what tells a regression in a new release from an old tab still running the last one; set it from your build (a version or a commit SHA).npm i @ezghcloud/rumyarn add @ezghcloud/rumpnpm add @ezghcloud/rumbun add @ezghcloud/rum// In your entry module, before the rest of your app import { init } from "@ezghcloud/rum"; init({ token: "ezgh_ct_…", release: import.meta.env.VITE_RELEASE });Single-page apps get a view per route change, named by the path with IDs replaced (
/users/:id). The framework packages name views by your router’s route templates.npm i @ezghcloud/rum @ezghcloud/rum-reactyarn add @ezghcloud/rum @ezghcloud/rum-reactpnpm add @ezghcloud/rum @ezghcloud/rum-reactbun add @ezghcloud/rum @ezghcloud/rum-react// main.tsx, with React Router's data router import { init } from "@ezghcloud/rum"; import { EzghErrorBoundary, instrumentReactRouter } from "@ezghcloud/rum-react"; import { createRoot } from "react-dom/client"; import { createBrowserRouter, RouterProvider } from "react-router"; import { routes } from "./routes"; init({ token: "ezgh_ct_…", release: import.meta.env.VITE_RELEASE }); const router = createBrowserRouter(routes); instrumentReactRouter(router); // views are named by route pattern: /users/:id createRoot(document.getElementById("root")!).render( <EzghErrorBoundary fallback={<p>Something went wrong.</p>}> <RouterProvider router={router} /> </EzghErrorBoundary>, );@ezghcloud/rum-reactneeds React 18 or later and React Router 7 or later. Its exports:EzghErrorBoundary: reports render errors with React’s component stack.fallbackis a node or(error, reset) => node;attributesadds attributes to the errors it reports.instrumentReactRouter(router): names views by route pattern, for data routers (createBrowserRouter). It returns a function that stops it.useEzghRouteTemplate(): names views from the route params, in framework mode or any tree under a router.useEzghView(name): starts a view namedname.
npm i @ezghcloud/rum @ezghcloud/rum-nextjsyarn add @ezghcloud/rum @ezghcloud/rum-nextjspnpm add @ezghcloud/rum @ezghcloud/rum-nextjsbun add @ezghcloud/rum @ezghcloud/rum-nextjsFor the App Router, Next.js 15.4 or later.
// app/layout.tsx import { EzghRum } from "@ezghcloud/rum-nextjs"; export default function RootLayout({ children }: { children: React.ReactNode }) { return ( <html lang="en"> <body> <EzghRum token="ezgh_ct_…" release={process.env.NEXT_PUBLIC_RELEASE} /> {children} </body> </html> ); }<EzghRum>starts the SDK once and names views by route template (/users/:id,/docs/:slug*). Report the errors your error pages catch:// app/error.tsx and app/global-error.tsx "use client"; import { useEzghErrorReport } from "@ezghcloud/rum-nextjs"; export default function Error({ error, reset }: { error: Error; reset: () => void }) { useEzghErrorReport(error); return <button onClick={reset}>Try again</button>; }Upload source maps from
next build:// next.config.ts import { withEzghRum } from "@ezghcloud/rum-nextjs/config"; export default withEzghRum({ /* your config */ }, { application: "storefront" });withEzghRumadds debug IDs to the client bundles after the production build, uploads their source maps (withEZGH_API_KEY,EZGH_ORG,EZGH_PROJECTand the release inEZGH_RUM_RELEASE; see Source maps) and removes the maps from the output, so they’re never served. It also has Next.js render<meta name="traceparent">, so the page load joins your server’s trace when the server is instrumented:// instrumentation.ts export async function register() { const { registerOTel } = await import("@vercel/otel"); registerOTel({ serviceName: "storefront" }); const { ezghTraceparent } = await import("@ezghcloud/rum-nextjs/instrumentation"); await ezghTraceparent(); }npm i @ezghcloud/rum @ezghcloud/rum-vueyarn add @ezghcloud/rum @ezghcloud/rum-vuepnpm add @ezghcloud/rum @ezghcloud/rum-vuebun add @ezghcloud/rum @ezghcloud/rum-vue// main.ts import { createApp } from "vue"; import { createEzghRum } from "@ezghcloud/rum-vue"; import App from "./App.vue"; import { router } from "./router"; const app = createApp(App); app.use(router); app.use(createEzghRum({ token: "ezgh_ct_…", release: import.meta.env.VITE_RELEASE, router })); app.mount("#app");createEzghRumtakes theinitoptions plusrouter(Vue Router 4, optional). It reports errors from Vue’s error handler, keeping anyapp.config.errorHandleryou set, and names views by route template.npm i @ezghcloud/rum @ezghcloud/rum-angularyarn add @ezghcloud/rum @ezghcloud/rum-angularpnpm add @ezghcloud/rum @ezghcloud/rum-angularbun add @ezghcloud/rum @ezghcloud/rum-angular// app.config.ts import { ApplicationConfig } from "@angular/core"; import { provideRouter } from "@angular/router"; import { provideEzghRum } from "@ezghcloud/rum-angular"; import { environment } from "../environments/environment"; import { routes } from "./app.routes"; export const appConfig: ApplicationConfig = { providers: [provideRouter(routes), provideEzghRum({ token: "ezgh_ct_…", release: environment.release })], };For Angular 19 or later.
provideEzghRumstarts the SDK when the app starts, names views by route, and providesEzghErrorHandler, which reports each error and then calls Angular’s default handler.<!-- In <head>, before your app's scripts --> <script src="https://cdn.jsdelivr.net/npm/@ezghcloud/rum@1.0.0/dist/rum.iife.js" integrity="sha384-RG4hDRdHe2euZZluxOe4k42GM7u496jg/z65MzgKOp0z9M1PAwJovHBqgmVUObj0" crossorigin="anonymous"></script> <script> EzghRum.init({ token: "ezgh_ct_…", release: "2026.10.13-4f2a9c1" }); </script>The script tag defines
window.EzghRum, with the same functions as the npm package. Pin the exact version, with theintegrityhash from that version’s release notes in the ezgh-rum-js repository. -
Upload source maps so errors show your files, functions and lines instead of minified code. Add the build plugin, or run
ezgh obs sourcemapsafter your build; see Source maps. Upload a release’s maps before you deploy it. -
See your data. Open your app and click around. Within a minute, Real user monitoring > Performance shows the page loads and Web Vitals. To see an issue, run
setTimeout(() => { throw new Error("RUM test") })in the browser’s console: it shows under Issues. The Setup tab’s last step says when the first page view arrived.
Next: send through your own domain so ad blockers don’t drop the data, trace requests to your APIs, and alert on new issues.